Zoom integration
Connecting Zoom and Trint to automatically upload meeting recordings
Updated over a week ago
Connecting your Zoom and Trint accounts will automatically upload any video-call recordings ready for transcript. This guide will show you how to connect and manage your accounts.
This support guide will cover:
Connecting your accounts
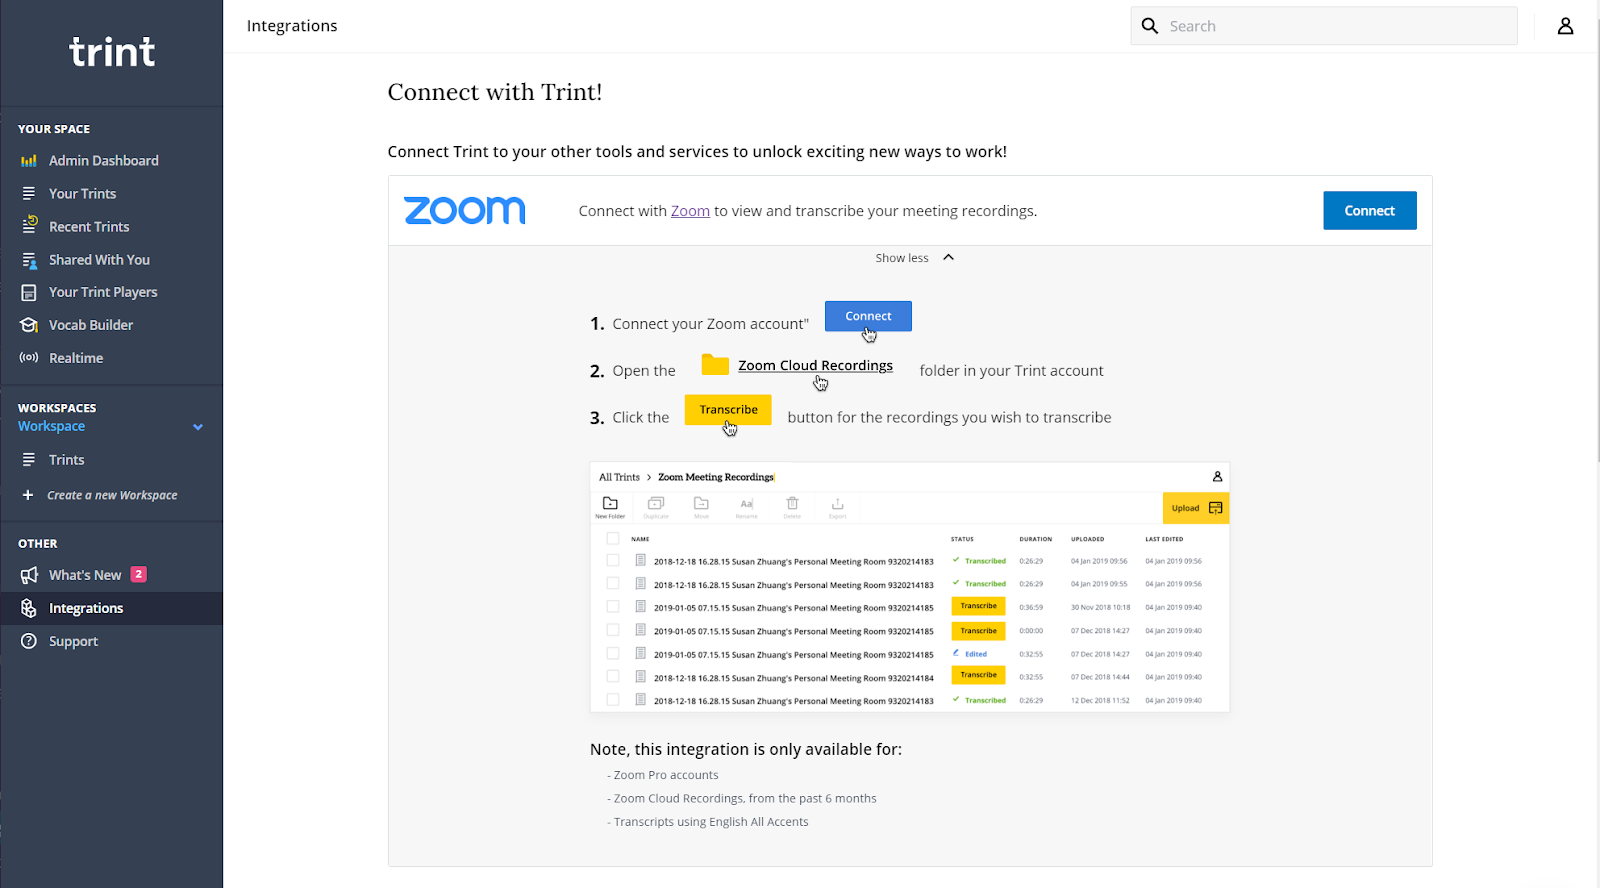
Log in to your Trint account and select the “Integrations” category from the sidebar to the left of your browser.
Now find Zoom from the list of Trint integrations and click the blue “Connect” button, which will take you to Zoom’s login page. Once you have signed in to Zoom you will be asked to confirm you want to link your Trint account.

Once you have connected your Zoom and Trint accounts, any video recording you make in Zoom will be uploaded automatically in Trint (they may take a few minutes to appear after the recording has ended).
Zoom will also upload your cloud recordings from the past six months to Trint.
You can find these in the “Zoom Cloud Recordings” folder, which will now appear in your My Drive dashboard.
Just click “Transcribe” next to each file to start transcribing.
Troubleshooting
If you can’t see any uploaded files in your “Zoom Cloud Recordings” folder, log in to Zoom and check that you have selected to save recordings in the cloud. Recordings not saved in the cloud will not be automatically uploaded to Trint.
Please note that the Zoom/Trint integration is only available if you have a Zoom Pro account.
Zoom video recordings can currently only be transcribed in English.
Disconnecting Zoom from Trint
If you no longer want your Zoom video recordings to upload to Trint:
-
Login to Zoom via the Zoom website.
-
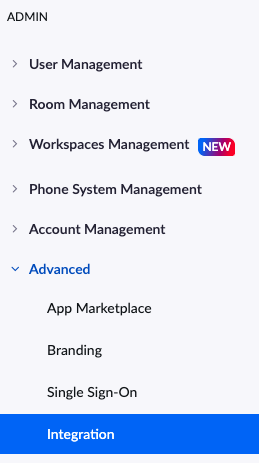
Find the “Admin” category on the left sidebar
-
Click on “Advanced” and then “Integration”

There you will be able to revoke rights for Trint.
We hope you have found this article useful. If you have any questions, please reach out to us at support@trint.com and our team will be happy to help.
Related support guides: